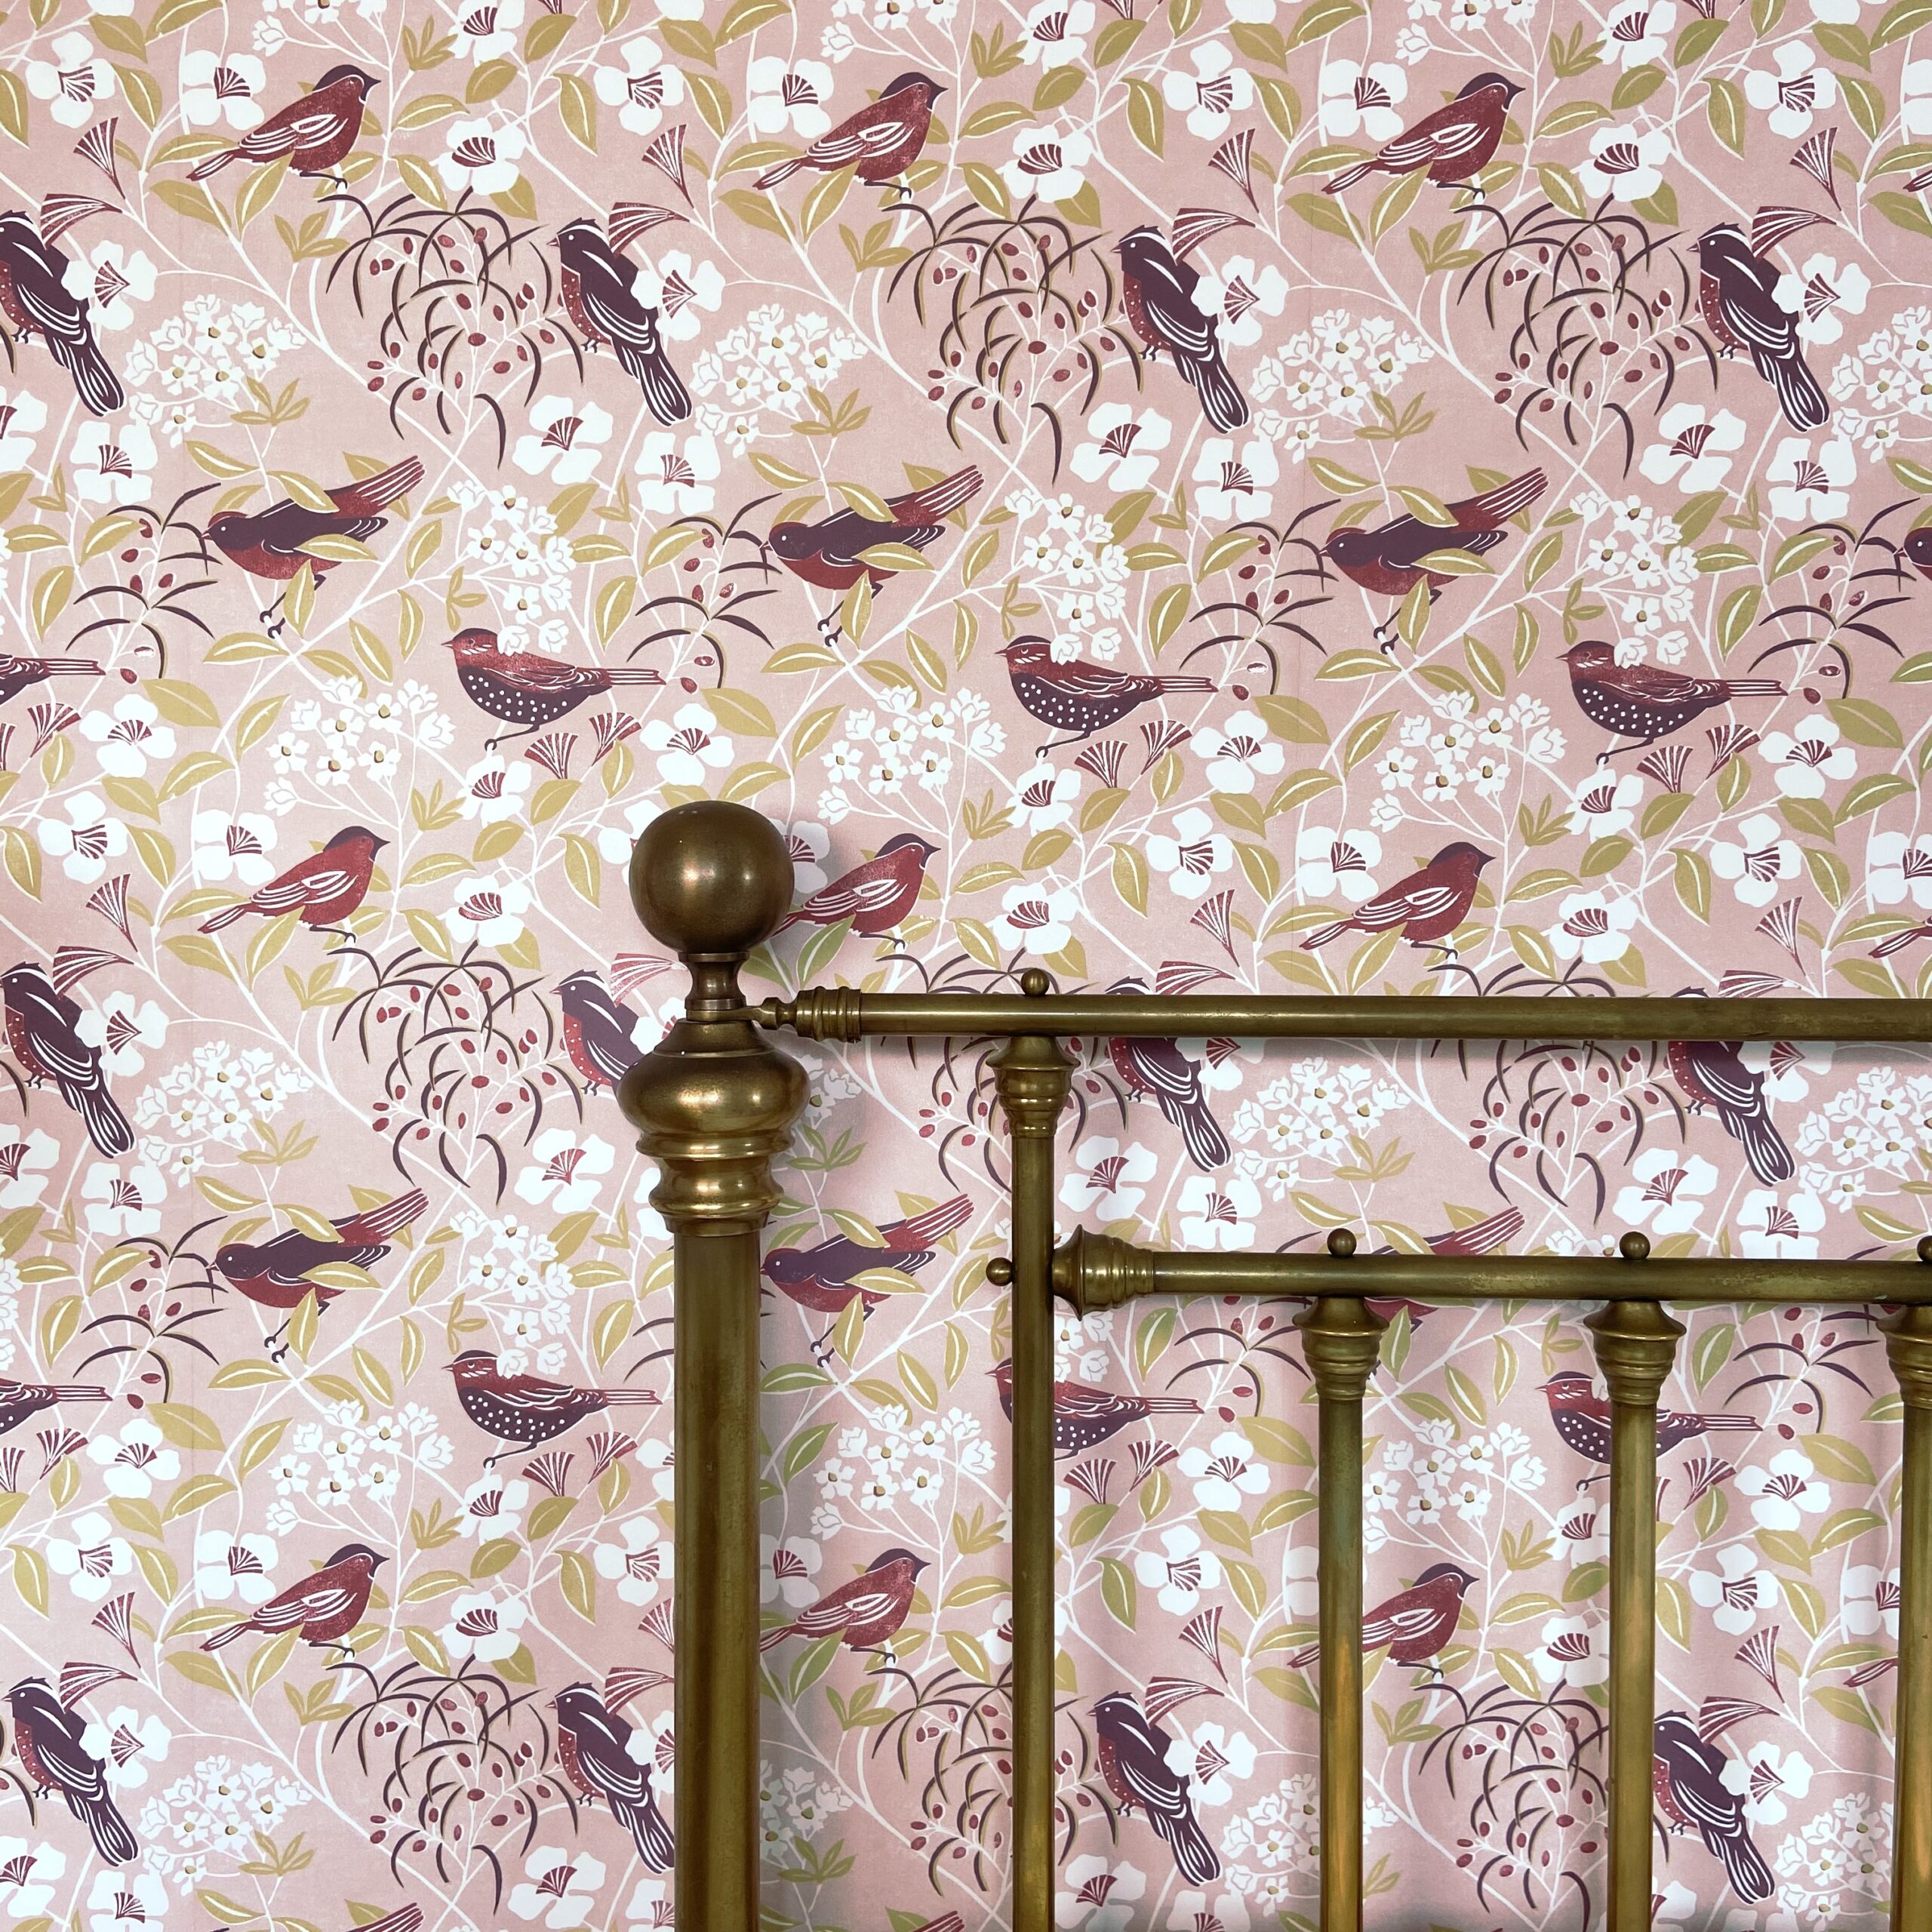
Wallpapering with “paste the wall” wallpaper is a relatively straightforward process with fantastic results. Here are a few tips to help guide you.
Before you start, ensure that the wall surface is clean, smooth, and free of any debris or old wallpaper. If there’s existing wallpaper, remove it entirely.
Remove all picture hooks, fill any big holes with Polyfilla. Small holes are fine, the wallpaper will cover them. Sand down any rough areas.
Loosen electrical bits, light switches, wall lights, electrical sockets etc so that you can get the wallpaper behind to give a professional finish ( you might need an electrician for this, but be sure to turn the power off first ). Alternatively you can cut the wallpaper carefully around them with a sharp knife as you go.
You can line the walls with lining paper. However I never do. Our wallpaper is thick and strong and will cover a multitude of sins. ( We have very uneven walls in our cottage ).
If the walls have been recently plastered, paint a white ‘mist’ coat ( basically a watered down white emulsion ) to seal the walls before starting. Also if the walls were painted a very dark colour before, a white ‘mist’ coat will prevent this showing through a pale coloured wallpaper.


Step1: Measure the wall’s height and width to determine how much wallpaper you’ll need, including a bit extra for trimming. The wallpaper calculator on my website will help you with this.
Step 2: Cut each wallpaper piece a few cms longer than you need top and bottom to allow for error.
Step 3: Ensure the pattern matches exactly from each piece to the next. Note that some repeats are longer than others and the design might have a slight variation where it appears to match. Always check the repeat size on the label .
Step 4: Count up how many drops (pieces) you will need for the wall ( remember they are 52cms wide ) and cut them all beforehand. All this preparation will make the job go so much faster when you get going.
Step 5: Make sure that each piece matches up to the next piece. I number the back of each piece lightly with a pencil.
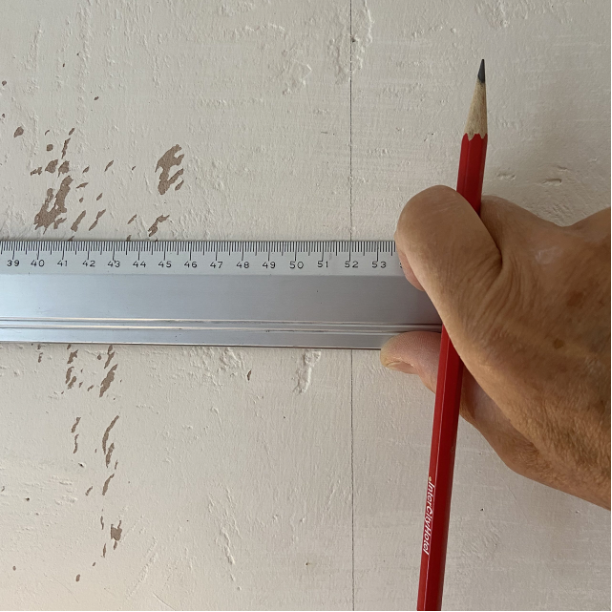
Measure your wall carefully. My wallpapers are 52cm wide. Draw the next guide line 52cm away and carry on marking perpendicular lines across the wall at 52cm intervals so that you will know roughly where to glue to each time.
N.B Don’t start at the edge of a wall as walls are very rarely straight ( even new walls ). Start somewhere in the middle of a wall, drawing a straight line with a spirit level. Don’t assume walls are straight.
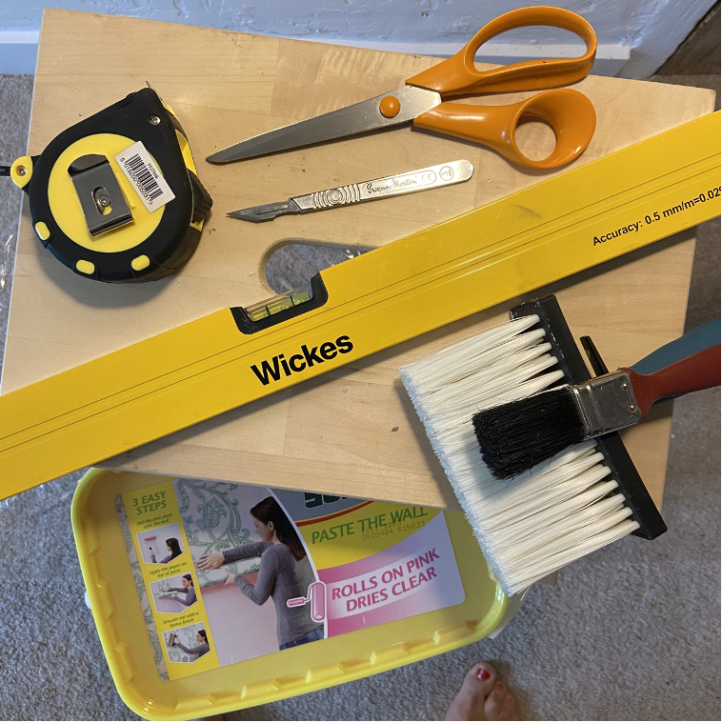
Once you have your lines drawn on the wall, paste the wall (not the paper), between two lines and a little bit over. N.B Too much glue is better than too little, it will all dry clear anyway.
Carefully position the first strip of wallpaper onto the pasted area, keeping it straight along your perpendicular line. Smooth it out from the centre to the edges using a wallpaper smoother, or a clean roller to eliminate air bubbles or wrinkles. Trim any excess at the top and bottom using a sharp utility knife or wallpaper scissors. Repeat this process for each subsequent strip, ensuring that the pattern matches up correctly from one strip to the next.
Don’t rush. By only pasting the area that you’re working on, you can go at your own pace.


Don’t try to ‘go around’ the corner of the room. Cut the paper at the corner and then overlap the next piece a fraction. Otherwise you might end up with a very rounded corner !
With your sharp knife cut a hole ( below I have cut a cross ) to let through any obstacles / pipes / wires etc and gently cut around them. Remember to leave enough wallpaper so that the fitting will cover it neatly when reinstalled.
Remember to have the electricity turned off or get an electrician to do this bit !


Once you have wallpapered a few times you will probably have tips and shortcuts of your own. Please feel free to share these. Everyone has a slightly different process and I’m always looking for new ideas.